Replacing the motherboard and changing the service tag on Dell R-series servers, particularly those from generation 12 and older, involves a few specific steps. Here’s a general guide to help you through the process, though you should refer to specific manuals for detailed instructions relevant to your exact model.
To start with, locate all the components that needs to be taken out of the server, this is as follows:
- CPU’s
- Hukommelse
- Fans
- Raid controller
- NDC
- I/O cards (FC cards, SAS cards, etc.)
- Kabler
- STRØMFORSYNINGER
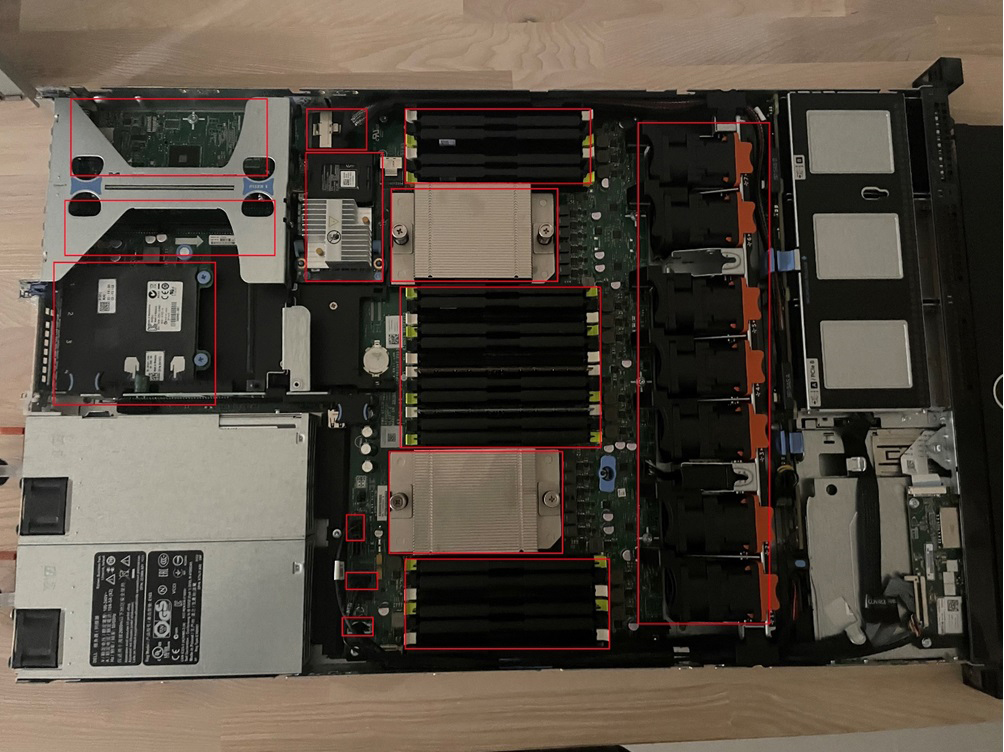
When all the cables and components are taken out of the server, you will be able to pull out the motherboard.
See our Dell Powerredge Servers her.
Replacing the Motherboard
- Preparation:
- Back up your data: Ensure all important data is backed up before starting.
- Gather tools and replacement parts: You’ll need a Phillips screwdriver and the replacement motherboard that is compatible with your Dell R-series server.
- Disassembly:
- Power down and unplug the server: Ensure the server is completely powered down and unplugged from all power sources.
- Open the server case: Remove the cover of the server by unscrewing or sliding it off.
- Disconnect components: Carefully disconnect all cables, wires, and components connected to the motherboard. This includes power supplies, hard drives, RAM, PCI cards, and any other peripherals.
- Remove the old motherboard: Unscrew the motherboard from the chassis and carefully lift it out. Be mindful of any standoffs or clips that might be holding it in place.
- Installation of New Motherboard:
- Place the new motherboard: Insert the new motherboard, and then connect all cables and now have a bootable Support Live Image ready, we recommend using SLI 2.2 (https://www.dell.com/support/home/da-dk/drivers/driversdetails?driverid=cwf92)
- Boot the server
- Boot: Then boot the server with this bootable ISO image, when the image is booted, you’ll have the option to select from different options. You should boot to the option called “DOS-Based Diagnostic Tools” Depending on you server generation, choose the option suitable for you generation of server.
Press “4” at the option or letter prompt

Then type “c:” and press “Enter”

Type “CD Util” and press “Enter”

Type “asset <New Asset Tag>” or “service <New Service Tag>”

At the confirmation prompt press “y”
Now the Service Tag and Motherboard should be properly replaced.
