Dell R-series 13th generation and older
Upgrading or replacing a motherboard in a server can be a daunting task, especially for Dell’s newer R-series Generation 13 and beyond. Unlike the previous models, Generation 13 simplifies the process. Here’s a step-by-step guide to help you replace the motherboard and update the service tag successfully.
Also read: How to Replace Motherboard and change Service Tag on Dell R-series 12th generation and older
Step 1: Prepare Your Server
Before you begin, ensure your server is turned off and disconnected from any power sources. This is critical to avoid any electrical damage or personal injury.
Components to Remove
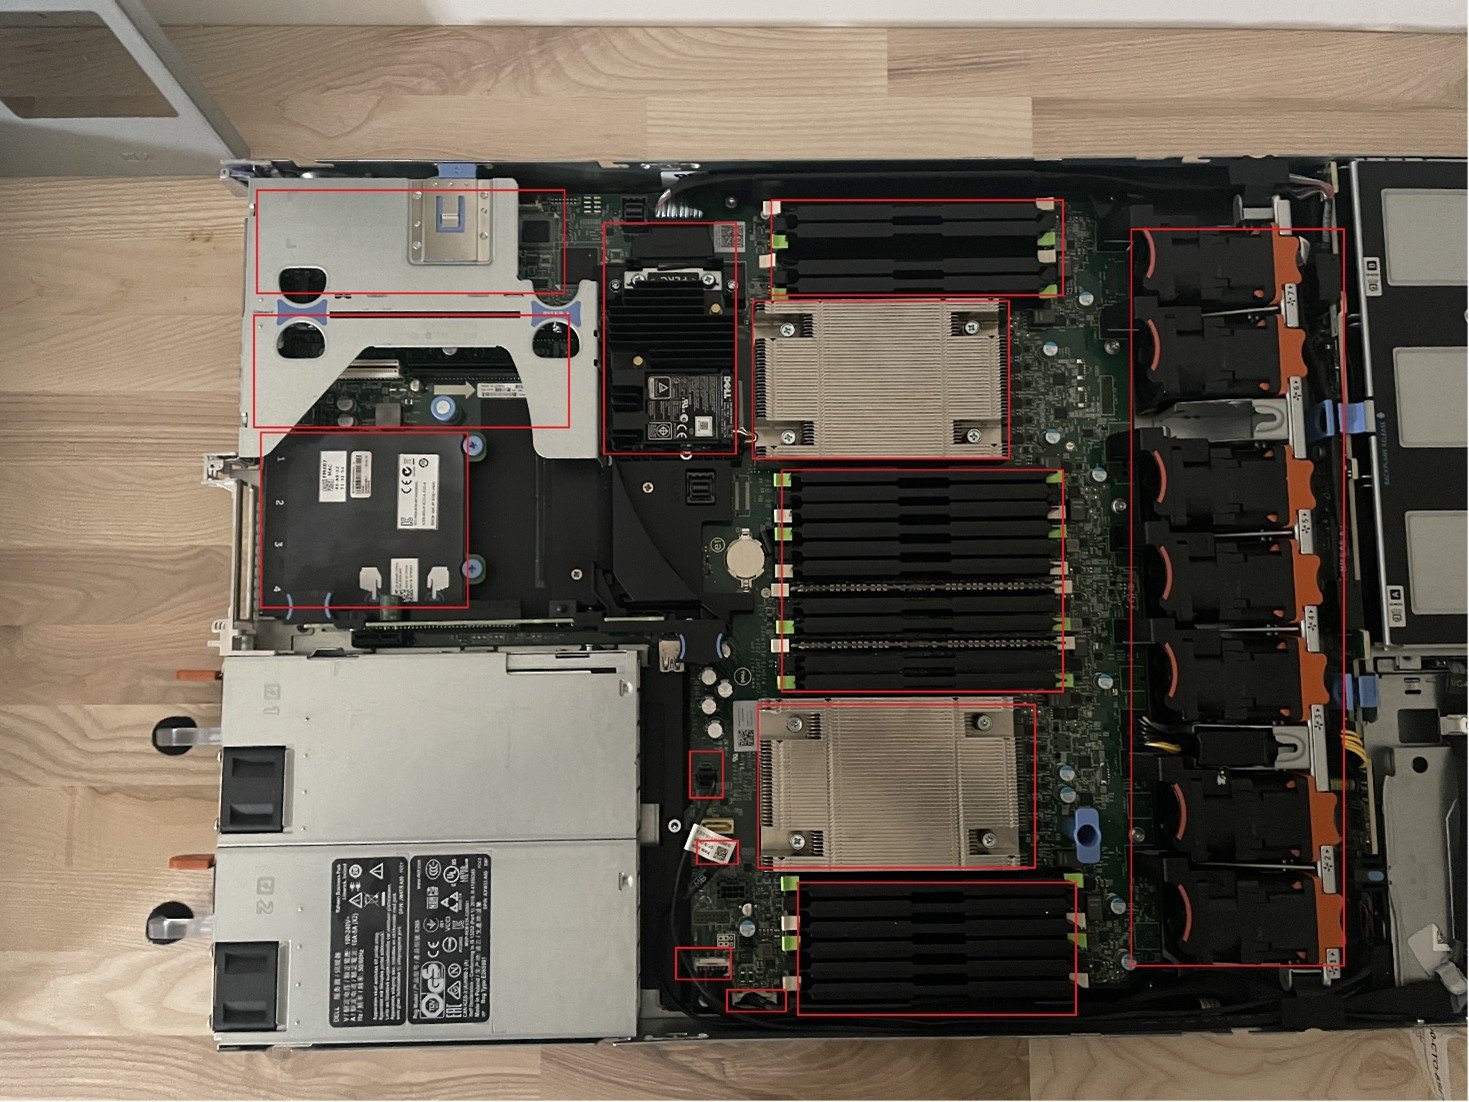
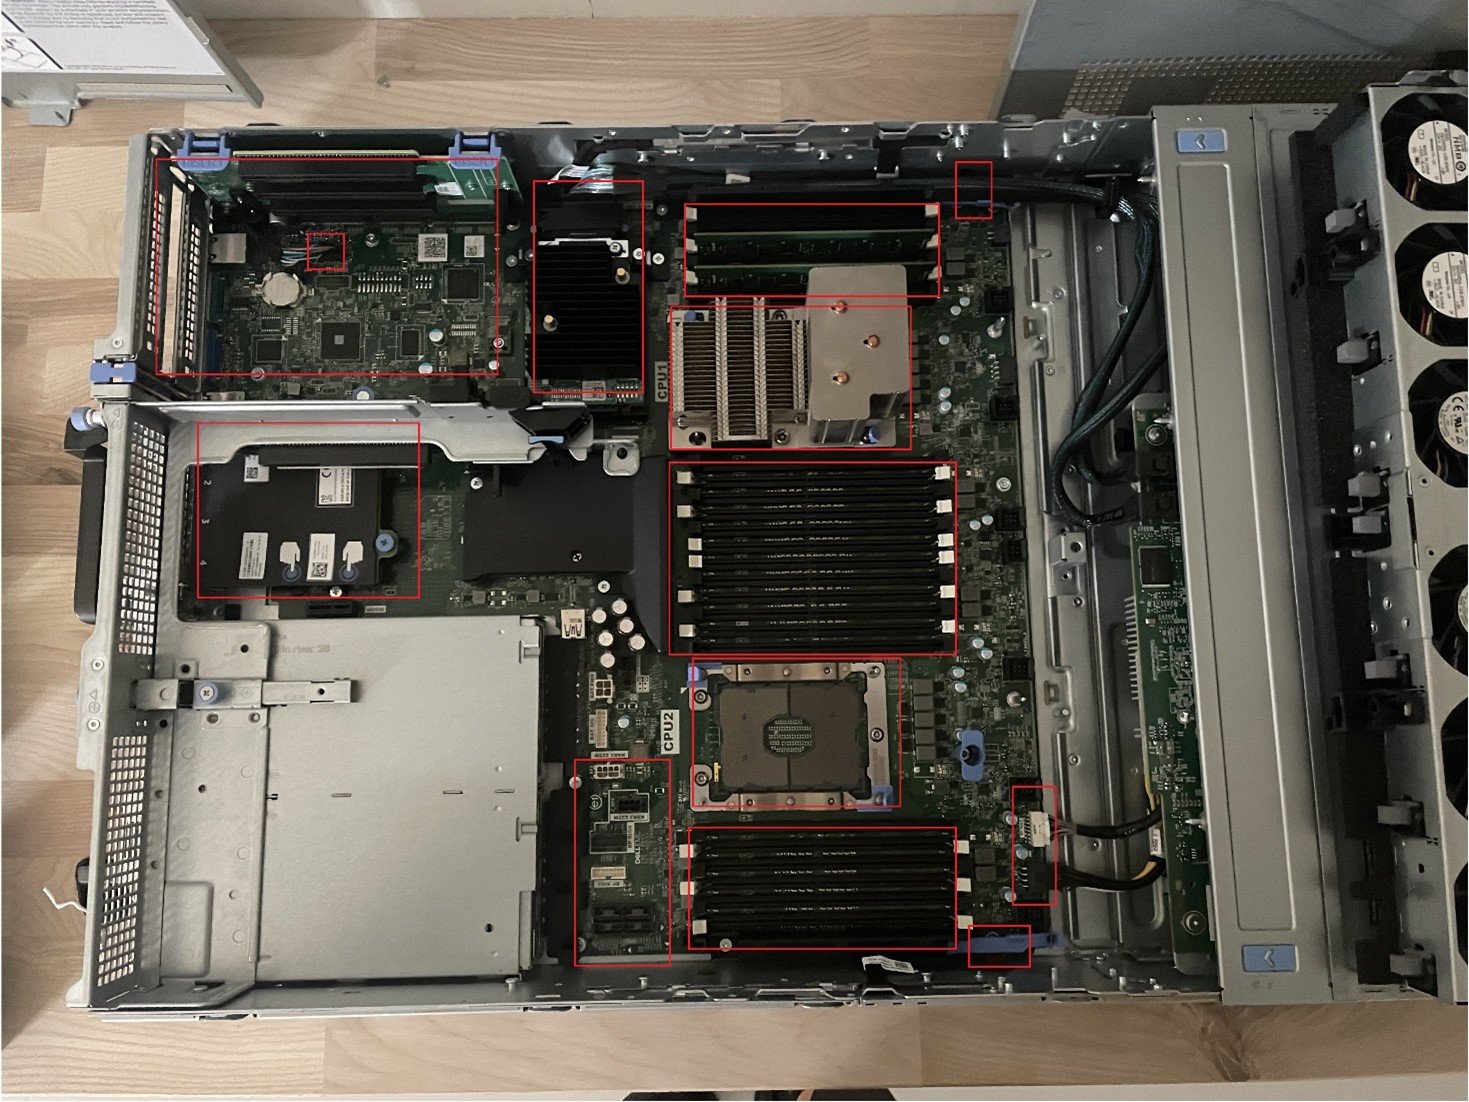
You’ll need to carefully remove the following components from your server:
- CPU(s): Handle these delicate parts with care.
- Memory Modules: Store in a static-free environment.
- Fans: Keep track of where each fan was located.
- RAID Controller: Document cable connections to reinstall correctly.
- Network Daughter Card (NDC): Remove and set aside.
- I/O Cards: Note each card’s placement and orientation.
- Cables: Label them to ensure correct reconnection.
- Power Supply Units (PSU): Remove after all other components.
Step 2: Remove the Old Motherboard
With all components removed, you can now safely extract the old motherboard from the server chassis. Be mindful of any remaining connectors or cables.
Step 3: Install the New Motherboard
Carefully align and place the new motherboard into the chassis. Secure it using the screws provided, ensuring not to overtighten.
Step 4: Reconnect Components
Re-install all the components you previously removed. Refer to your labels and notes to make sure every piece goes back correctly and all cables are securely connected.

Step 5: Configure the Motherboard
Locate the PWRD_EN jumper on the motherboard. For initial setup, you’ll need to set this jumper to pins 4 and 6. This setting temporarily disables any existing BIOS passwords and enables service tag modifications.
Step 6: Update the Service Tag
- Boot the Server: Turn on your server and press F2 to enter the BIOS setup during boot.
- Modify the Service Tag: Navigate to the “Service Tag Settings” found at the bottom of the BIOS menu. Enter the new service tag here.
- Reboot and Reset: Save your changes and reboot the server. Allow it to proceed past the BIOS screen, then power down.
Step 7: Reset the Jumper
After updating the service tag, remember to reset the PWRD_EN jumper to its original position (usually pins 1 and 2).
Final Steps
Reconnect your server to power and perform a final boot to ensure everything is functioning correctly. Check that the new service tag is displaying correctly during the boot process.
See our Dell Powerredge Servers here.
Dell R-series Generation 13 servers
Changing a motherboard and updating the service tag in Dell R-series Generation 13 servers is straightforward with proper preparation and attention to detail. Always handle server components with care and ensure you’re grounded to prevent static damage. This guide should help you smoothly manage hardware upgrades or replacements in your server environment.
Remember, while Dell indicates that changing the service tag on Generation 13 and up servers isn’t supported, the method described here has been found to bypass these restrictions effectively. However, proceed with caution and at your own risk.
